Using SOCK5 Michanger
I.Download & Installation
II.User Guide
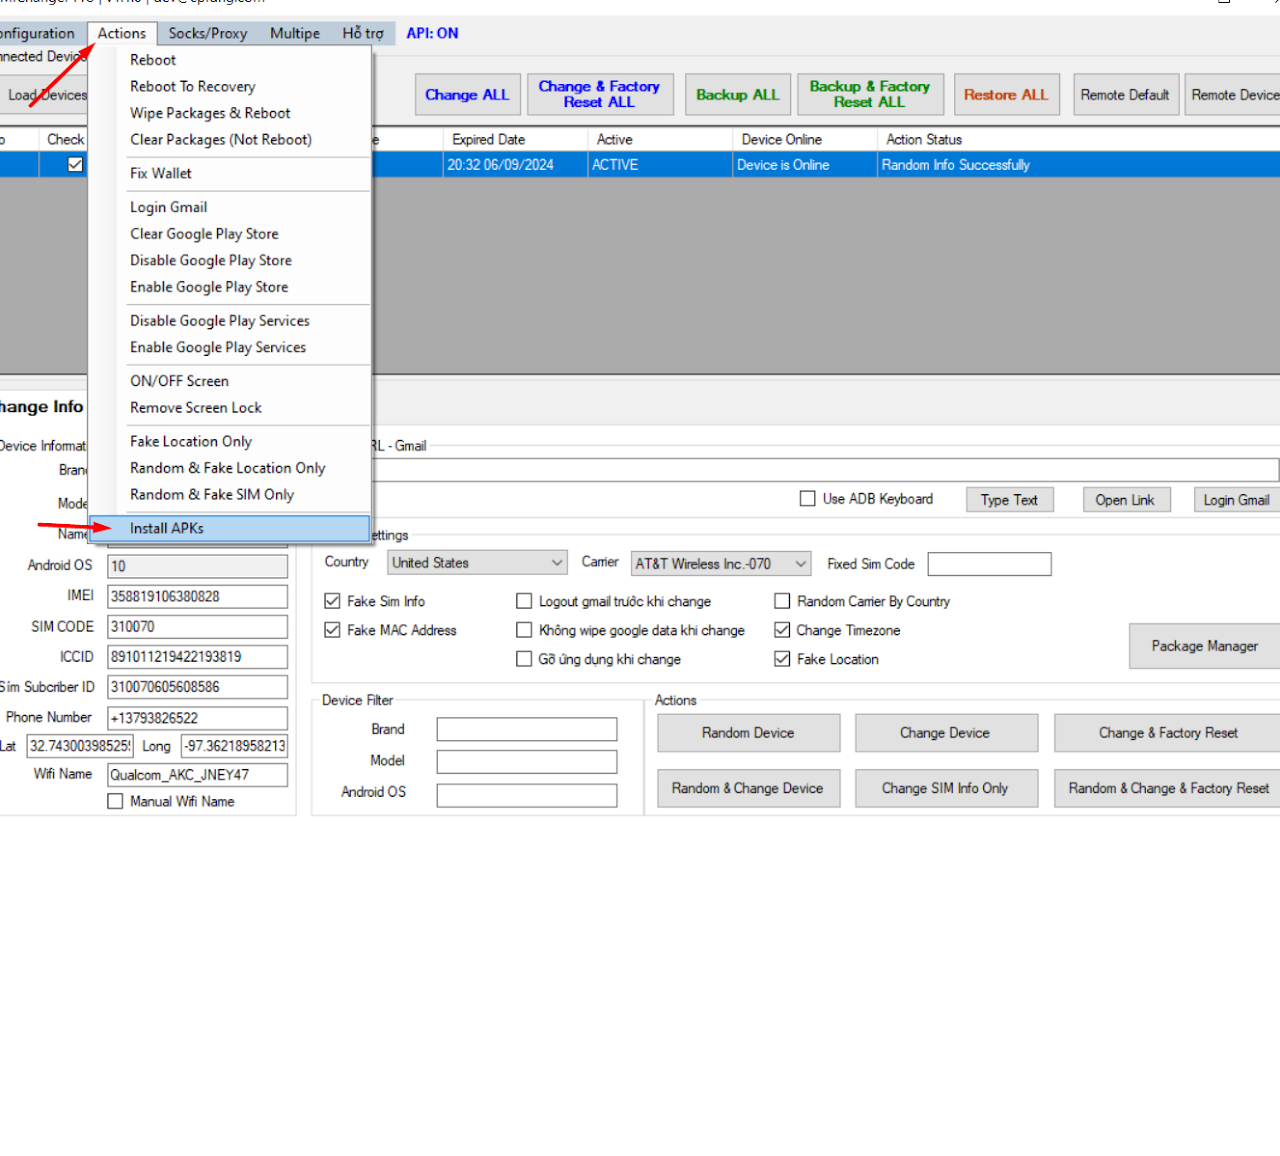
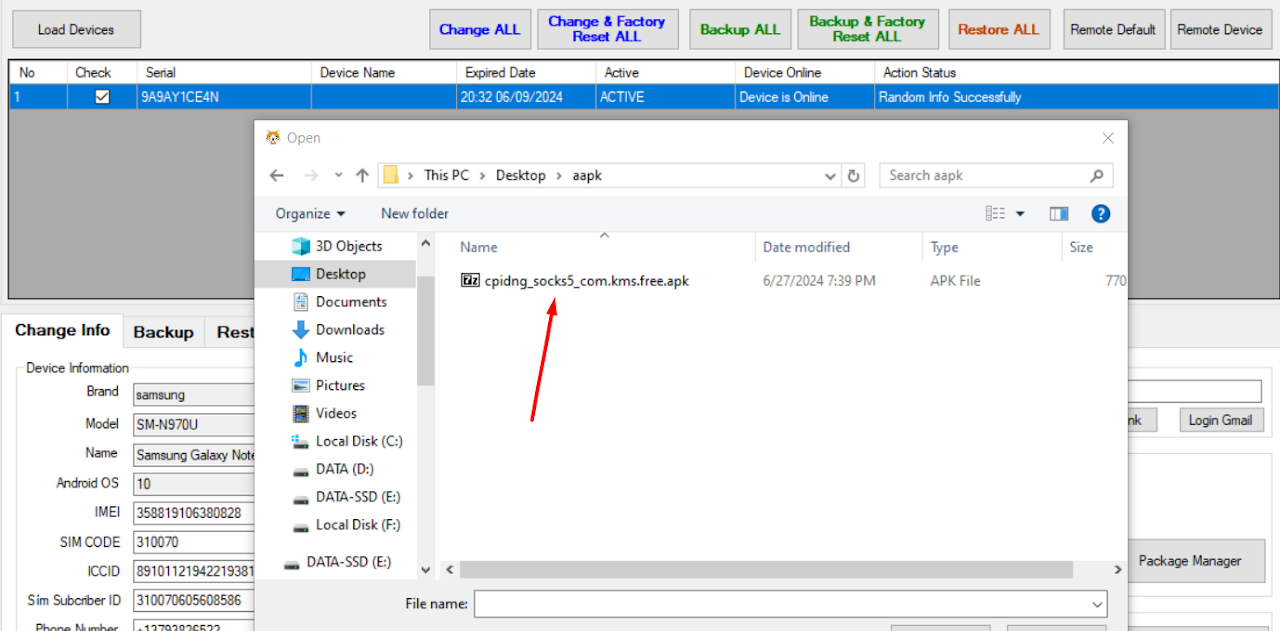
1Step 1: Install APK
- Download the APK file to your computer.
- Drag and drop the APK file into the Remote Device window on the MiChanger tool.
- Wait for the installation success notification.
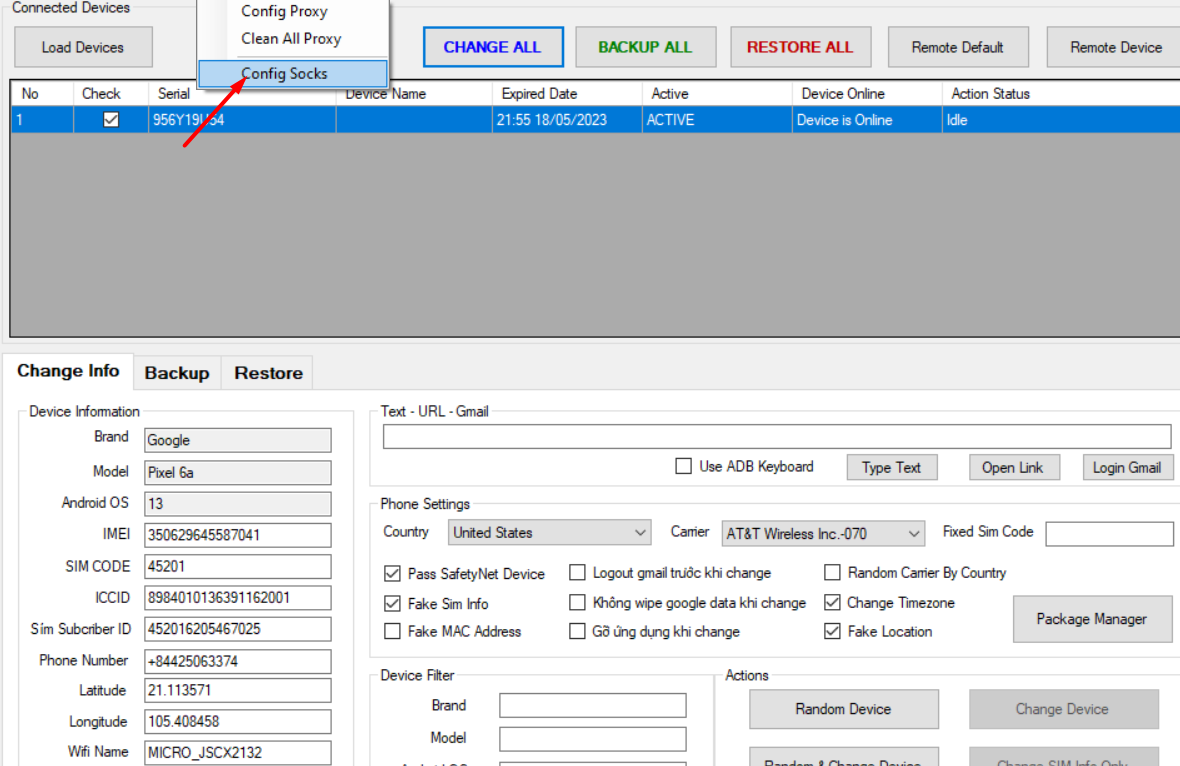
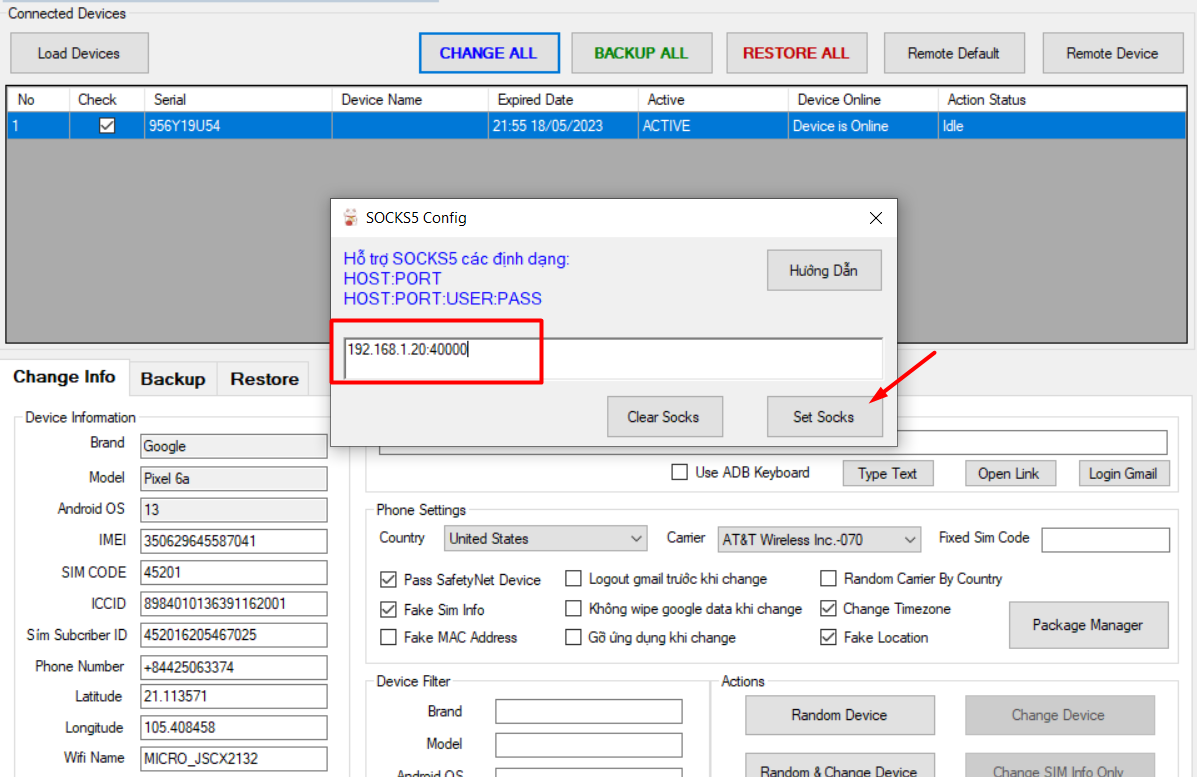
2Step 2: Configure Sock
- On the MiChanger tool, select menu Sock/Proxy -> Config Sock.
- Enter Sock information into the configuration box.
- Click Set Sock to apply.
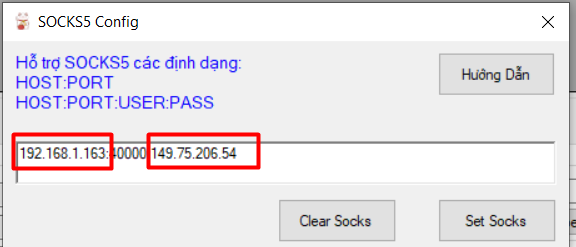
3Step 3: Fake WebRTC IP (Important)
To avoid leaking your real IP via WebRTC, you need to configure it correctly.
Check at: https://browserleaks.com/webrtc
Input Format:
- No user/pass:
HOST:PORT:IP_WEBRTC - With user/pass:
HOST:PORT:USER:PASS:IP_WEBRTC
Note
HOST and IP_WEBRTC must be different values. If they are the same, there will be no network connection.
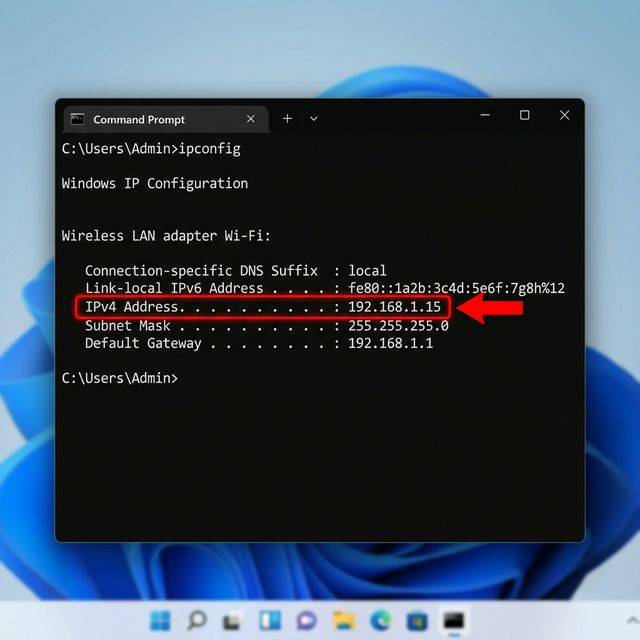
How to get IP_WEBRTC (LAN IP)
- Open the Start menu, type cmd and press Enter to open the Command Prompt.
- Type the command
ipconfigand press Enter. - Look for the IPv4 Address line, usually in the format
192.168.x.x. This is the LAN IP you need to enter in theIP_WEBRTCfield.

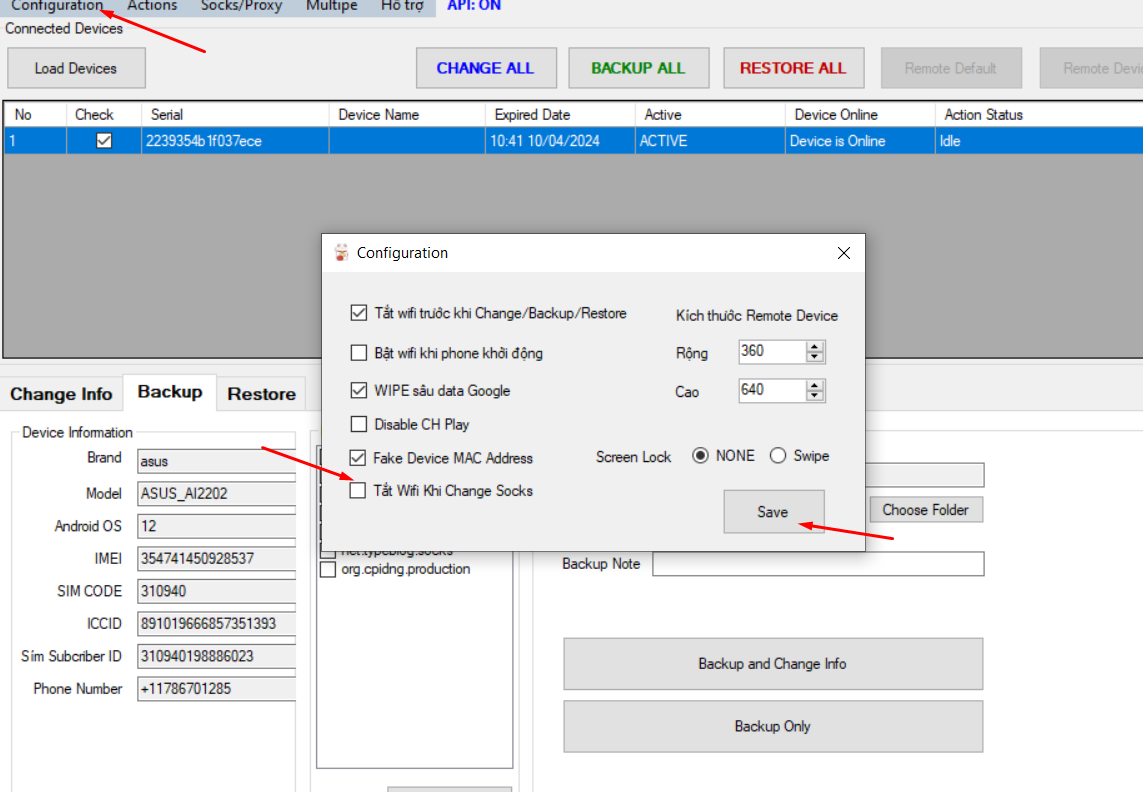
4Fix No Network Issue
If configured correctly but still no network, perform the following settings:
- Go to Configuration (Top left corner of Michanger Plus tool).
- Uncheck the line Turn Off Wifi When Change Socks.
- Click Save.
5How to get IP_WEBRTC (LAN IP) via Command Prompt
- Press the Windows key on your keyboard or click the Start menu.
- Type cmd and press Enter to open the Command Prompt window.
- In the black window that appears, type the command ipconfig and press Enter.
- Look for the Ethernet adapter (if using a cable) or Wireless LAN adapter Wi-Fi (if using Wi-Fi) section.
- The address you need is on the IPv4 Address line. It usually looks like 192.168.x.x (e.g., 192.168.1.15).
Note
This is the value you will enter for the Host part in the Sock configuration string in Step 3.